logo
Products
quote
Products
Products
Products
Home > Products > Fuser Unit > Fuser Unit FK-6307 for KyoceraTaskalfa 3500i 4500i 5500i 302LH93066 302LH93065 302LH93064 302LH93060 302LH93067 Printer Parts Fuser unit assembly
Catagories
Contacts
Contacts: Mr. Jessie
Fax: 86-0757-86771039
Contact Now
Mail Us

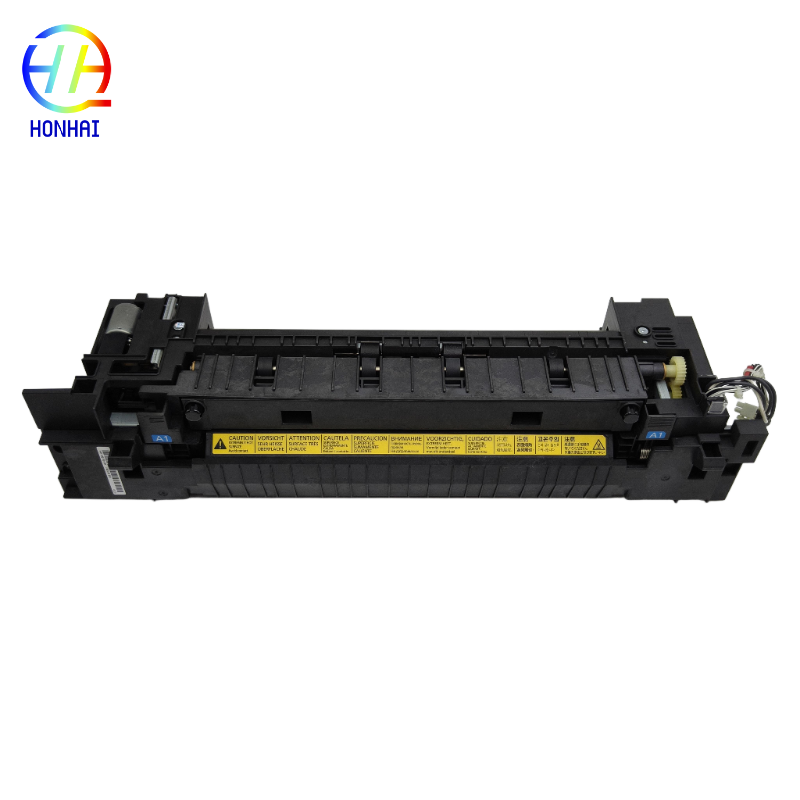
Fuser Unit FK-6307 for KyoceraTaskalfa 3500i 4500i 5500i 302LH93066 302LH93065 302LH93064 302LH93060 302LH93067 Printer Parts Fuser unit assembly

Product Details

Place of Origin: China

Brand Name: Kyocera

Model Number: FK-6307

Payment & Shipping Terms

Minimum Order Quantity: 10

Packaging Details: Neutral Packing

Delivery Time: 3-7 work days

Payment Terms: T/T,Western Union

Supply Ability: 5000 piece/ month

Get Best Price
Highlight:

Kyocera fuser unit assembly

,

FK-6307 fuser unit with warranty

,

Taskalfa printer fuser replacement part

Fuser Unit FK-6307 for KyoceraTaskalfa 3500i 4500i 5500i 302LH93066 302LH93065 302LH93064 302LH93060 302LH93067 Printer Parts Fuser unit assembly

Your high-volume Kyocera TASKalfa printing should remain at peak operational level using this top-rated fuser assembly (FK-6307). The fuser assembly represents the main heating component of your copying/printing device and is responsible for applying specific heat/pressure to ensure permanent adherence between toner and paper.

This fuser assembly has been engineered to provide optimum reliability. Keep your high-volume Kyocera TASKalfa copier operating at optimal efficiency by installing this quality fuser unit (Part Number FK-6307). The fuser assembly is the main heating element of the printer and provides the correct heat and pressure for fusing toner onto the paper.

This durable fuser assembly has been manufactured for use with the Kyocera TASKalfa printers, including models 3500i, 4500i, and 5500i, and is designed to hold up under the stress of production print operations expected in most enterprise-level working environments. If you are experiencing problems with prints rubbing off, smudged text, ghosting, or excessive paper jams in the fuser, it's time to get a new fuser unit. Installing this fuser unit will allow high-volume printing at high-speed and produce high-quality professional documents continuously on every page.

Product Specifications:

  • Part Number: FK-6307
  • Alternative Part Numbers: 302LH93066, 302LH93065, 302LH93064, 302LH93060, 302LH93067
  • Product Type: Fuser Unit / Fusing Heating Assembly
  • Condition: Brand New
  • Expected Lifespan: Approximately 600,000 pages
  • Compatible Printer Models:
    • Kyocera TASKalfa 3500i / 3501i
    • Kyocera TASKalfa 4500i / 4501i
    • Kyocera TASKalfa 5500i / 5501i

Fuser Unit FK-6307 for KyoceraTaskalfa 3500i  4500i 5500i 302LH93066 302LH93065 302LH93064 302LH93060 302LH93067 Printer Parts Fuser unit assembly 0Fuser Unit FK-6307 for KyoceraTaskalfa 3500i  4500i 5500i 302LH93066 302LH93065 302LH93064 302LH93060 302LH93067 Printer Parts Fuser unit assembly 1Fuser Unit FK-6307 for KyoceraTaskalfa 3500i  4500i 5500i 302LH93066 302LH93065 302LH93064 302LH93060 302LH93067 Printer Parts Fuser unit assembly 2Fuser Unit FK-6307 for KyoceraTaskalfa 3500i  4500i 5500i 302LH93066 302LH93065 302LH93064 302LH93060 302LH93067 Printer Parts Fuser unit assembly 3Fuser Unit FK-6307 for KyoceraTaskalfa 3500i  4500i 5500i 302LH93066 302LH93065 302LH93064 302LH93060 302LH93067 Printer Parts Fuser unit assembly 4Fuser Unit FK-6307 for KyoceraTaskalfa 3500i  4500i 5500i 302LH93066 302LH93065 302LH93064 302LH93060 302LH93067 Printer Parts Fuser unit assembly 5

Usage & Installation Notes:

  1. ⚠️ High Temperature Warning: Always turn off the printer, unplug the power cord, and allow the machine to cool down for at least 45 to 60 minutes before attempting removal.
  2. Power Safety: Ensure the printer is completely disconnected from the power outlet to prevent damage during the installation process.
  3. Handle with Care: Do not touch the surface of the pressure roller or the heating element with your bare hands. Skin oils can cause permanent print defects. Avoid scratching the roller surface with sharp tools.
  4. Secure Connections: When installing the new unit, double-check that all electrical connectors and harnesses are securely plugged in to avoid error codes.
  5. Test Print: After installation, print multiple test pages to verify that the toner is fixing correctly, the print quality is sharp, and no error messages appear on the printer's display.